
How to Remove a Flush Mount Ceiling Light?
Aloysius NoordamHave you ever looked up at your ceiling light and wondered how to remove a flush-mount ceiling light without breaking anything? Many homeowners face the same issue when dealing with a flush-mount ceiling light. The reason is that these fixtures have hidden screws, delicate glass covers, and electrical wires.
But the good thing is, taking down a flush-mount ceiling light isn't as complicated as it looks. Once you know how it's connected to the ceiling, the whole process becomes much easier. Wondering how? Worry not! In this guide, I'll share simple steps for removing a flush-mount ceiling light. By the end, you will be able to do it confidently and without any mess.
Why Do You Need to Remove a Flush Mount Ceiling Light?
Several reasons ignite you to remove your flush-mount ceiling lights. Let's discuss situations where you must remove a flush-mount ceiling light.

-
Replacing an Old Fixture: Our preferences for lighting styles change with time. You might want to replace your outdated flush-mount light with a modern one. In this situation, you first need to remove the old flush-mount ceiling light.
-
Cleaning and Maintenance: Over time, dust, insects, and dirt can accumulate inside the glass cover of flush-mount lights. This can highly affect the brightness and overall look of your lights. For cleaning purposes, you must remove the flush mount ceiling light.
-
Fixing Electrical Issues: When you notice your light flickering, it is definitely due to an electrical issue. If you don't address it at the time, it can cause burning or serious results later. To check and fix electrical problems, you have to remove your flush-mount light.
-
Ceiling Repairs: When painting or renovating your ceiling, it's vital to remove the flush-mount lights. It makes the job easier and prevents splashes from reaching the fixture of your flush mount light.
What You'll Need to Remove a Flush Mount Ceiling Light?
Before we proceed with removing flush-mount ceiling lights, you'll need some basic tools. When you gather these tools first, you can save yourself from hassle later. It not only saves you time but also prevents you from frustration. Here is a list of standard tools you must keep with you when removing a flush-mount light.
-
Screwdriver
-
Voltage Tester
-
Ladder or Step Stool
-
Flashlight or Headlamp
-
Wire nuts (for disconnecting the wiring)
-
Small container (to hold screws and clips)
-
A soft towel or cloth (for placing the light cover)
How to Remove a Flush Mount Ceiling Light: Step-by-Step Guide
Now that you have all the essential tools and setup, the next process is much easier. You don't need to be an expert to remove a flush-mount light —just carefully follow the steps below!
Step 1: Turn Off the Power & Set Up Your Space
Before starting the procedure, your safety comes first. Before you touch your flush-mount ceiling light, turn off the power. This prevents electric shock while working. So go to your home's electric panel. After that, find the circuit breaker that controls the specific room's light and turn it off. But what if you are not sure which breaker controls the room?
Here, I suggest turning off the main power for extra safety. After turning off the power, double-check it with a voltage tester. Now the next step is to set up your space. For this, you have to place a sturdy ladder or step stool directly under the flush-mount light fixture. It should be tall enough so you can reach it comfortably.
However, make sure the ladder is stable and on an even surface. If it shakes or moves, you may fall and get injured. It's also a good idea to clear the area beneath your flush-mount light. If there are any delicate items or furniture, move them away. It will give you enough space to move and work around more easily.
Step 2: Remove the Light Cover or Shade
Once your power is off and your space is ready, it's time to remove the flush-mount light cover or shade. This step is what most people find tricky. Why? Because the flush-mount ceiling lights have hidden clips, screws, or latches. But you need not worry! Step up your ladder, stand safely, and take a closer look at your flush-mount light.
You might notice small screws, metal clips, or a decorative finial (the round knob in the center). Now figure out how these screws are attached. If your flush-mount light has screws, gently unscrew them with a screwdriver. However, don't rush the process; unscrew them one at a time. Moreover, while doing so, keep your other hand under the flush-mount light’s glass cover.
However, instead of screws, if your flush mount light has metal clips, slide them outward. Even some modern alabaster flush mount lights have spring-loaded covers. If your flush-mount light is like that, you will need to twist those springs slightly counterclockwise to unlock it. Once the cover or shade is free, hold it with both hands and lower it slowly.
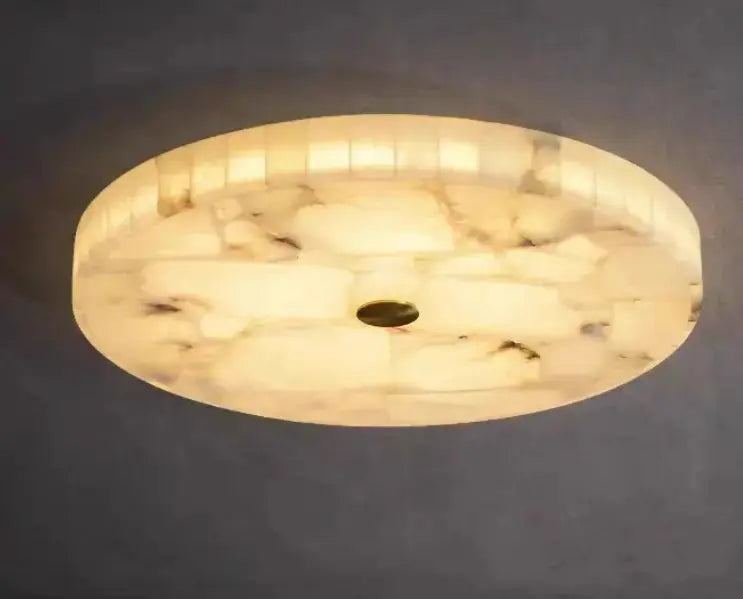
![Round Spain Alabaster Flush Mount Ceiling Lights Ceiling Lamp [product_tags] Fabtiko](https://cdn.shopify.com/s/files/1/0699/8219/1926/files/Ceiling-Lamp-Round-Spain-Alabaster-Flush-Mount-Ceiling-Lights-Fabtiko-1691748260571.jpg?v=1691748261)
Quick Highlight: Remember, the covers of flush-mount lights are very fragile. If you place them anywhere, they can break. So I recommend putting them on a soft towel or cloth to prevent scratches or cracks. Also, you should keep all the screws and metal clips in a small bowl so they don't get misplaced.
Step 3: Remove the Bulbs & Locate the Mounting Screws
Now that the cover or shade is off, you can easily see the light bulbs and the fixture base. Right? The next step is to remove those flush-mount light bulbs. However, before removing the bulbs, make sure your hands are clean. If not, clean them with a cloth so that you can grip the bulb firmly. Now, gently unscrew each bulb in a counterclockwise direction.
If any of the bulbs feel stuck, gently wiggle them while turning. But I advise not to apply too much force as the bulbs are very delicate and can break. Once the bulbs are out, place them safely on a soft cloth or towel. Now that you've taken out the bulbs, it's time to locate the mounting screws.
These screws keep the fixture of a flush-mount light is attached to the electrical box inside the ceiling. So, look closely around the edges or the center of the base plate. Here you will usually find two or more screws. These screws are visible on some flush-mount lights. However, sometimes, they may be slightly hidden behind decorative caps. So if you find such a cap, gently pull it off. The screw will be right underneath it.
Step 4: Disconnect the Wires Safely
After removing the bulbs and the locking screws of flush-mount lights, the next step is to disconnect the wires. This is a critical step that requires extra care. But don't worry, if you go slowly and cautiously, you can do it easily. So, first, loosen the mounting screws you located earlier. However, you must keep one hand on the fixture of the flush-mount light.
Once the screws are loose, gently lower the fixture base a few inches. At this point, you will see three types of wires connecting the light fixture to the ceiling, like in an alabaster light fixture. These wires include:
-
Black (or red): The live wire that carries electricity
-
White: The neutral wire
-
Green or bare copper: The ground wire
But before touching these wires, stop for a while and double-check the current with a voltage tester. If everything is all right, look closely at how the wires are joined. Most flush-mount light fixtures use wire connectors. To disconnect these connectors, simply twist them counterclockwise until they come off. Once the wires are separated, wrap the house wires with tape and keep it aside.
 Step 5: Remove the Mounting Bracket & Clean the Area
After disconnecting the wires, the final step is to remove the mounting bracket. A mounting bracket is the metal piece that holds your flush mount light fixture to the ceiling. Removing the bracket means you have removed your flush-mount light.. You can see that this bracket is usually attached with two or more screws. So take a screwdriver and start loosening these screws one by one.
However, while doing so, place one hand on the bracket to prevent it from falling. Once you remove all the screws, gently pull the bracket away from the ceiling. That's it! Your flush-mount lights are finally removed. Now you can see the electrical box inside the ceiling with wires. Now is a good time to clean all the dust around the electrical box. So, use a soft cloth or a small brush to wipe everything clean.
DIY or Hiring a Professional: Which Option is Best?
The answer to this question depends on the type of your flush-mount light. Do you have some experience with electrical work, and do you often do it? Then, removing the flush-mount light is a DIY project for you. Doing it yourself can also save you money and boost your confidence. But remember, this process is simple as long as you follow the steps carefully.
If you miss any step, like forgetting to turn off the power, removing flush mount lights can be dangerous. On the flip side, not everyone feels comfortable working with electricity. That's fine! If you're unsure about wiring, prioritize your safety.
If your flush-mount light fixture seems outdated, I suggest calling a licensed electrician. A professional can safely remove the flush-mount light, check the electrical box, and even install a new fixture without risk. This way, you avoid mistakes, shocks, or damage to your ceiling.
So, what's the best choice? The answer is simple: If your flush-mount light fixture is basic and easy to reach, and you feel confident following safety rules, DIY is a great option. But if you're not sure, or if your home's wiring looks confusing, it's always safer to call a professional.
Frequently Asked Questions
How long does it take to remove a flush-mount ceiling light?
The exact time required to remove a flush-mount light depends on the fixture type and your experience. If the screws are easy to reach and the wiring is simple, it can be done quickly. On average, it takes about 15 to 30 minutes to remove a flush-mount ceiling light.
Can I reuse the same mounting bracket for a new flush-mount light?
Yes, you can sometimes reuse the same mounting bracket for a new flush-mount light. However, before reusing it, check that the screw holes and bracket size match the new light's design. Moreover, you should also check that it is in good condition and not rusted or damaged.
Do I need to label the wires before removing them?
Yes, labeling the wires before removing them is a perfect idea. It helps you remember which wire connects where when you install the new light. This simple step saves time, prevents confusion later, and makes installation easier.
Conclusion
Flush-mount lights are one of the most loved custom lighting options for interiors. They brighten the space and give an overall modern look. But these lights are not made to last forever. For various reasons, you may need to remove the flush-mount lights. Many people think that removing these lights is a very tricky process and cannot be done on its own.
But the truth is that it's pretty easy. If you follow the steps I have discussed in this article, you can remove a flush-mount light like a pro. However, never compromise on your safety. For this, you should follow every single step, as each is equally important. Lastly, if your house has old wiring, I recommend asking for professional help.